How to replace a Discovery 3 lower steering shaft
Loose steering joints are an obvious MoT fail. Joints that are seizing are less obvious, but they need prompt replacement.
Before power steering, turning the steering wheel could be a test of strength. Early Series Land Rovers have a relatively massive steering wheel just to give the necessary leverage. Power steering changed all that, and today’s steering is light and responsive using a much smaller wheel But when something goes wrong with the steering you notice it straight away as you try to turn the wheel. In addition to the modern power steering box or rack, there is still a much simpler mechanical link in the steering system, little changed from the old days.
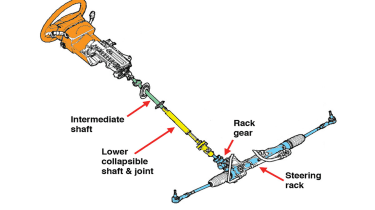
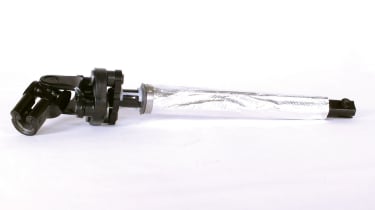
On the Discovery 3 there are three shafts in this mechanical link between the steering wheel and the steering rack at the chassis: a top upper steering column, an intermediate shaft, and a lower collapsible shaft which incorporates a steering joint. In the case of this particular Discovery 3, the bottom yoke (universal joint) on the lower shaft which connects it to the power steering rack had seized, and was causing the steering to feel extremely stiff.
The universal joint that connects the lower shaft to the steering rack is very exposed to the elements, so is liable to corrosion and seizure. The owner of this 55-plate 2006 Discovery 3, with over 140,000 miles on the clock, had complained of stiff steering. The steering system was checked over underneath the vehicle, and no faults were found in the rack or the joints and linkages that provide the steering and suspension set-up.
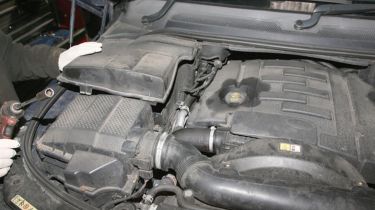
That left the steering column. But this, like with so many parts on the Discovery 3, is concealed out of sight by plastic covers under the bonnet. The bottom end of the lower shaft can be checked from below the vehicle once the engine’s under-tray has been removed. When checking the lower joint that connects the shaft to the steering rack, it was found to be seized, meaning the complete lower shaft would need to be replaced. This is not a difficult job once the top of the shaft has been accessed.
The shaft is held in position to the intermediate shaft by a single bolt at the top. At the bottom, it slides onto the input shaft of the steering rack and is secured by a single bolt. Once loosened at the top and bottom, the yoke (UJ) should simply slide upwards off the input shaft, allowing it to be removed from the vehicle. It’s important not to rotate the steering wheel once the damaged column has been loosened and then removed. To make sure the steering wheel is not moved and it remains in the straight ahead position, we locked the steering wheel by using the steering lock.
Parts needed
The lower collapsible steering shaft is part number QMN500240 (from VIN 6A389495 RHD) and costs around £65. You'll also need a bolt for the intermediate to lower shaft, part number QYG10016L, costing around 50p, as well as a flanged hexagon bolt (lower shaft to the steering rack,) part nu,ber QY000030, costing around 80p.
Health and safety
• This job is not recommended for DIYers unless you have the required competence, knowledge and facilities. This feature is intended to show how a garage might approach the work on your car, and is not a DIY guide. Work should always be carried out to Land Rover specifications and procedures. • When working on a raised vehicle, ensure it is firmly supported and stable at all times, and cannot be dislodged. Ensure lifting and support equipment is correctly rated and in serviceable condition. • It’s recommended that when working in the engine compartment the battery is disconnected. Always follow the procedure prescribed by Land Rover. • To avoid damaging the steering wheel internal components and switches, the steering wheel must not be turned while the lower shaft is disconnected.
Click on the gallery below for our handy step-by-step guide…
Find a car with the experts


