Upgrade the cab heater blower on your series III
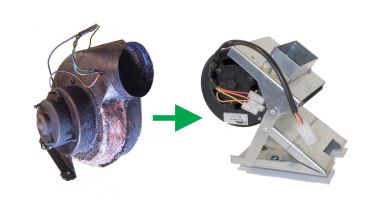
Series III heater blower casings corrode badly, reducing efficiency which was never good in the first place. Gary Stretton has a solution.
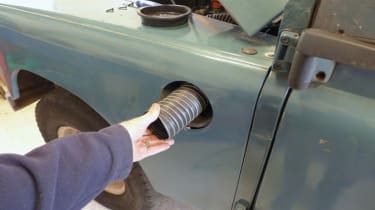
The tendency with Series III heater blower efficiency is for it to fall somewhere between useless and adequate, depending whether all components are functioning correctly. Importantly, the lower dash vents and hoses can hemorrhage airflow if the seals and flaps are not in perfect order.
The heater matrix, being an independent unit from the blower fan, should be treated as such and dealt with separately. Fitting an uprated heater matrix, along with improved airflow to improve heat output is easy enough, although wonders can be worked by flushing and cleaning a standard matrix.
Mine was treated to two overnight doses of a gel-type household lime-scale remover and vigorous flushing with a hose. The debris that was removed looked like tagliatelle, but the resulting heat output was nothing short of a revelation.
Certainly, the coolant side of the heating system needs to be in good order to take advantage of the uprated blower. Whether single or twin speed, Smiths complete blower units are becoming expensive to repair or replace, assuming a good replacement can be found, though the motor alone is available for around £70.
So that was my challenge: to find a modern blower unit offering more oomph than the original. I gave up looking around scrapyard cars because modern blowers are buried deep in the nether regions of dashboards.
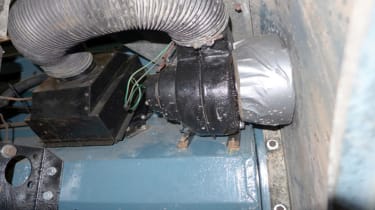
Then I stumbled across SPAL Automotive UK who, I discovered, created the original snail blower design that was adopted by Land Rover and many others. The range is extensive, but my criteria wasn’t – I wanted a compact blower with improved output and more than two speeds, if possible. Having spoken with SPAL, I was advised their 008-A100-93D would be the best solution because the motor is IP68 rated, meaning it’s a waterproof, dust-proof unit – and it has three speeds.
All I had to do was create the mounting bracket. Approximate costs were: blower £75, joining sleeves £10.27 (pair), 82mm ducting x 1 m £19.31, 18 SWG galvanised steel offcuts £2 to £5 each, Maplin switch £3.99. This feature shows how I installed the unit but, even if you don’t take this route (there are many alternative methods of upgrading the system), I hope it helps you to create your own solution to improve a Series III’s hot air demisting and cold air ventilation and, of course, to provide a warm cab for the winter, all via an efficient airflow.
Tools: General workshop kit, metal shears, angle grinder with thin cutting disc, files, drill and bits, multimeter, wiring, hot air gun, bench vice or metal folder.
Contact:Thanks to SPAL Automotivewww.spalautomotive.co.uk Tel. 01905 613 714Revotec www.revotec.com Tel. 01491 824424
Health and safety
• Ensure wires are correctly connected to prevent permanent damage to the resistor or motor. • Once fitted, double-check all wiring before reconnecting the battery and switching the fan on. • Beware of sharp edges when cutting and forming metal brackets. • Wear eye protection from swarf when drilling.
Click on the gallery below for our handy step-by-step guide…
Find a car with the experts


