How to fit Polybushes: Disco 1 and 2, Defender, and Range Rover classic and P38A
There are good reasons for fitting polyurethane suspension bushes. Ed Evans explains how the job is done
The original suspension bushes on a beam axle Land Rover can be expected to be good for at least 100,000 miles, depending on how and where the vehicle has been driven. So why would we want to replace them with polyurethane bushes?
Although the vehicle may appear to be riding and handling well, original bushes deteriorate gradually with time and use. As the bushes’ performance reduces, we drivers slowly adapt to the change, not noticing subtle, but cumulative, changes in the handling, ride quality, and the vibration levels being transmitted from the road.
And bush performance is often disguised by deterioration of the springs and dampers. A new set of dampers can transform a vehicle’s road behaviour but, if the bushes have deteriorated, suspension and steering performance will not be up to scratch. Of course, replacing with standard Land Rover bushes will obviously restore the handling, ride and vibration isolation, but Polybushes are significantly cheaper, and are claimed to be extra long-lasting.
And they do seem to last well. I fitted a set to my own Discovery 2 a few years ago when it had covered only 30,000 miles from new, and the handling, comfort and noise levels were indistinguishable from the original Land Rover bushes.
After 50,000 miles I removed the Polybushes to check their condition, and I couldn’t see any visual sign of deterioration – no wear and no compression set. Certainly, the vehicle had continued to drive well. Another benefit of these bushes is that they are offered in three different specifications, including:
• Performance grade bushes are red, and are the firmest, giving taut steering and ride characteristics suitable for brisk road driving, and also giving increased stability and feel for heavy towing. • Comfort grade bushes are blue, and are similar in performance to original bushes. They’ll give the best ride quality and the best noise and vibration insulation. • Dynamic grade bushes are orange, and they offer a compromise between Comfort and Performance grades. Expect handling to be a little tighter with improved responsiveness, plus good ride quality with the flexibility to withstand the extreme movements and loads experienced off road.
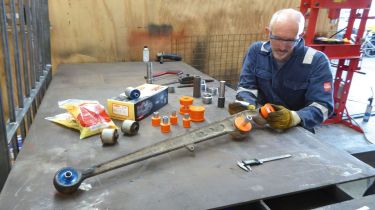
Here, we show a set of Dynamic orange bushes being fitted to a Discovery 2 belonging to off-roader, Kevin Chadwick. Kevin runs a 4x4 and Land Rover specialist garage in Clapham, North Yorks where he and mechanic Andy Plummer will be doing the work.
Tools: General workshop tools, hydraulic press, selection of mandrels or suitable large socket spanners
Time: 6 hoursCost: £258
Contact
Polybush www.polybush.co.uk Tel:01978 664316, email sales@polybush.co.uk
Radius arms
The front and rear radius arms on the Discovery 2 seen here have similar fixings and bushes at their two attachment points – to the chassis and to the front and rear axle brackets. Fixings vary on other beam axle vehicles, but the installation procedure shown here is similar on all.
The part of the job which is likely to cause most difficulty with the radius arms is the removal of the old bushes. Ideally, a hydraulic press is needed, though if you don’t have one a local garage may oblige if the radius arms are removed and taken to them. Removing the old bushes from the axle end of the radius arms is fairly easy, and the new bushes can often be simply pushed in by hand, or by using a vice or compression clamp.
The bushes that locate the radius arms to the chassis brackets will need considerable force to push them out of the arms, and also to push the new bushes in. All four radius arms are dealt with in the same manner, illustrated here on the rear left arm. Polybush recommends lubricating the bushes or their housings with soapy water or tyre soap to help them slide into the component bores more easily.
Options
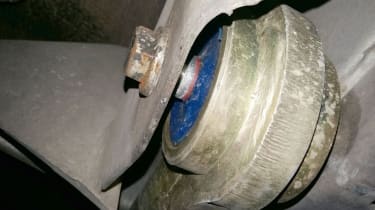
This Polybush has been fitted to a camber-correction radius arm (used with suspension lift) at the chassis end on a Discovery 2
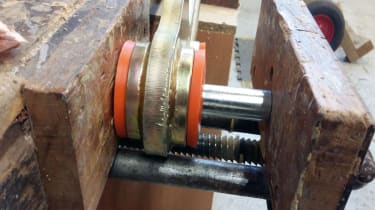
The axle-end twin bushes on the same camber-correction radius arm have been squeezed in with the help of a bench vice
Watts linkage to chassis
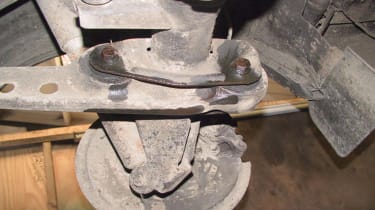
The Watts linkage on the Discovery 2 provides lateral stability to the rear axle. Two rigid steel link bars, one each side of the diff, are located by bushes to brackets on the chassis. Their inboard ends connect to a pivoting short link mounted on the axle diff casing.
This arrangement enables the axle to move up and down at each side with the suspension movement when the vehicle is riding over undulations or cornering, while preventing it from moving sideways. Here, we are replacing the outer bushes that locate the linkages to the chassis brackets, and we’re showing the left hand side link being worked on.
Panhard rod
The front Panhard rod (which, unlike the rear suspensions Watts linkage, can be found on other beam axled Land Rovers) locates the front axle to the chassis to prevent sideways movement of the axle and to increase steering stability.
The Panhard rod is a simpler arrangement than the Watts linkage, formed of a single straight rod which is bolted through bushes between a bracket on the chassis and another on the front axle. If the Panhard bushes are worn, they can produce vague or unresponsive steering.
Results
I spoke with Kevin a few days after the Polybush kit had been fitted to his Discovery 2, after he had the opportunity to drive the truck on road and off road. The verdict: “The vehicle now feels more sturdy and stable, both off road and on road, especially when cornering. As far as ride is concerned, the bumps can be felt a little more.” This sounds exactly right for the effects of this orange Dynamic grade Polybush kit – exactly as claimed by the manufacturer.
Click on the gallery below for our handy step-by-step guide…
Find a car with the experts
