How to replace a Defender rear crossmember
It’s usually a job for the pros, but replacing a rear crossmember is a practical DIY job if you have the skills and knowledge
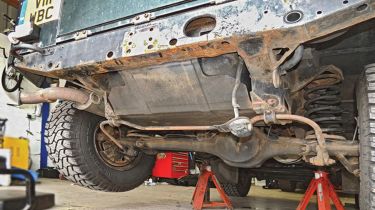
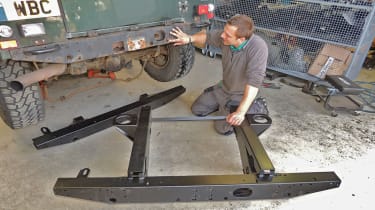
Don’t take that Defender rear crossmember for granted. One with visible corrosion – or one that’s been badly repaired – could turn out to be literally a death trap when towing or winching. Here’s how IRB carries out a professional replacement on Land Rover driver Phil’s beloved hard-working and hard-towing Defender, using one of the crossmember repair sections that they can supply through mail order.
So, you’ve got an MoT on your Defender, which proves the rear cross-member must be safe and sound, right? Well unfortunately, that’s not always the case – and that’s because Defender crossmembers can only be visually checked and lightly tapped by MoT testers. But you can do what an MoT tester may not – give any suspect areas a good wallop with a hammer or even the point of a cold chisel. If it’s sound, the worst damage you can do to it is dent it, but if it’s rotten you might be shocked by the holes that appear.
Bear in mind the great forces involved when towing, and often even greater when winching – forces that are often carried primarily by the crossmember. And since it’s not unknown for a corroded crossmember to fly apart when under great stress, you really do need to make sure that yours is sound. One more point, though: the chassis to which you are planning to weld your replacement crossmember must be sound, or else you’ll be moving the weak-point further along the vehicle. If chassis rails are too corroded to take a new crossmember, it will need replacing.
Time taken: 8 hoursCost: £195+vat. IRB crossmember as fitted (supply only) is £195 + VAT. (A 1/4 chassis version is £280 + VAT). The total price is always, of course, based on a quote – it all depends how bad the chassis is.
Tools
• 100 mm angle grinder as well as cutting, grinding and linishing discs (or plasma cutter with compressor)• Welding equipment and safety gear• General hand tools
Health safety
• Ensure the vehicle is securely supported on a flat firm floor, with wheels chocked and a gear engaged.• Remove flammable objects or keep them protected before welding or grinding.• Place fire fighting equipment close to hand. • Store the fuel tank in a separate area from the work place.• Always wear the appropriate protective clothing when welding or grinding.
Click on the gallery below for our handy step-by-step guide…
Find a car with the experts


