How to rebuild the sunroof on Freelander 1
We don’t need sunroofs in winter, but they’ll still leak, even when kept closed. Ed Evans seeks a watertight solution.
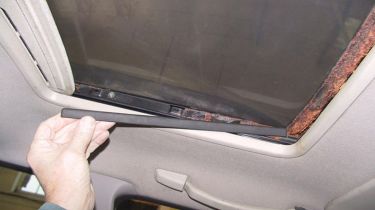
The sunroof on this Freelander has let a lot of water in over the years, even though it was just an occasional drip. Despite checking the sunroof’s drain lines, fitting a new seal to the glass and re-aligning the roof, the steady drip continued when the rain and wind suited.
The result was a heavily corroded internal frame on the underside of the glass, and it led to the replacement of the lift mechanisms on both sides purely because the screws were too rusted to be removed. It’s another example of how prompt and more complete maintenance can save much time and money later. This extra work caused by the corrosion problems means that this feature now includes how to change the glass and its steel frame, replacing the glass’ sealing strip, motor removal and replacement of the lift mechanisms – which just about covers everything. We’re in the Britpart development workshop with Steve Grant, finding more than we bargained for.
Removing the lift mechanisms
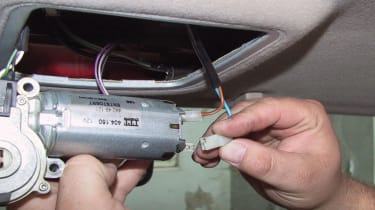
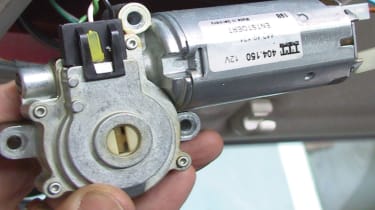
The lift mechanisms on each side of the sunroof aperture are operated by two spiral (or worm drive) cables. These, in turn, are driven by the sunroof motor which is above the headlining, behind the front interior light bezel. Each cable is an integral part of the lift mechanism assembly, so the cable comes out with the mechanism. So, the first job in removing the lift mechanisms is to gain access to the motor, and then detach it from the cable gearbox in the roof so that the cables are free to be pulled through. The lift mechanisms are simply secured to the side of the roof aperture tray by four Torx screws on each side.
Fitting the new glass roof panel
Despite renewing the two lift mechanisms because of the seized screws still holding the remnants of the glass roof’s metal frame to them, we still had a problem. The new mechanisms came with the threaded brass inserts fitted to accept the screws which hold the glass panel’s frame to the mechs, but they didn’t come with new screws. Normally, you would reuse the screws that came out of the old mechs, but ours were rusted in. So that meant a trip to the local hardware supplier where Steve sourced six socket head screws of the correct 4BA thread.
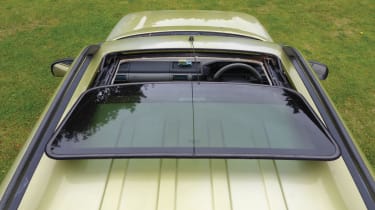
The heads were larger than those of the original Torx screws, but they would have to do. And the screws were too long for the blind holes they would be screwing into, so Steve shortened them and filed up the ends of the thread to ensure a good entry. We would also need washers under the heads, which were smaller in diameter than the original Torx heads. For this particular model, the replacement steel underframe with a new glass bonded to it is supplied by Britpart and is a Genuine Land Rover part, number EFT500070. Expect to pay around £128.
A result
When reassembled, the sunroof worked perfectly – open, close, tilt – and, in the two months since doing the job, not a drop of water has come through, despite standing out in the weather and driving in heavy rain. If yours is leaking, then before fitting a new seal around the glass, check the bonding of the steel frame to the glass, and check whether it is seriously corroded. If it is, it will allow the glass panel to move in the aperture, so that even a brand new seal cannot do its job. The answer in such cases, is a new glass and bonded frame assembly.
Tips and tricks
If the motor needs changing, it will lift out through the headlining after unplugging the cable connectors.
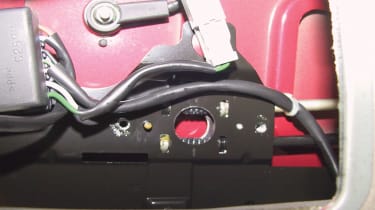
The gearwheel on the top of the motor engages in the circular hole in the gearbox here, between the two drive cables
The screwdriver slot on the motor can be used to turn the motor gear, to align the teeth with the cables when refitting it.
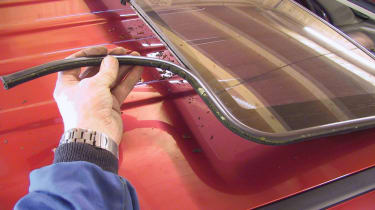
New glass seal may cure leaks if glass/frame bond is sound – fit from centre rear. Part EEQ100340, costs around £47. Also fits Discovery 1.
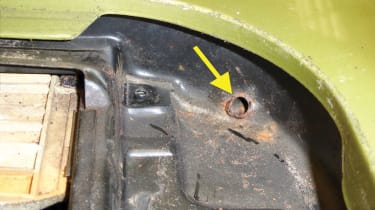
Gently pour water into the roof near the drain tube. It will exit under the car, unless tube is blocked (use air line) or disconnected inside.
Health and safety
• When working at the top of the roof, ensure you have a stable raised platform to work from.• Adjust the front seats for a comfortable position when working overhead inside the vehicle. • Wear eye protection when working overhead, when clearing rust debris and when using compressed air to clear drain tubes.
Click on the gallery below for our handy step-by-step guide…
Find a car with the experts
