How to dismantle a rolling chassis
A complete strip down is the ultimate way to sort rust, and it’s not difficult. Trevor Cuthbert reports
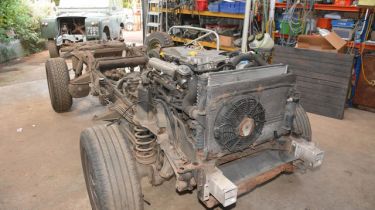
A Land Rover chassis has many components attached to it, even after the main body shell has been removed. While the absence of the body gives access to much more of the chassis, there is still a large proportion of it that is hidden behind parts such as the fuel tank, brackets, hoses and pipes. Later Land Rover models, such as the Discovery 2 shown here have even more systems in place, such as Active Cornering Enhancement (ACE) system, air suspension and air conditioning.
Many of the components attached to a chassis can create a moisture trap – and therefore rust – and their removal will allow thorough investigation, as well as the opportunity to comprehensively repair and/or treat the complete chassis.
Likewise, if a chassis is being replaced with a new one, all parts need to be completely removed. A decision on what action is to be taken with this Discovery will be made after the chassis is stripped. So for now, it is time to set to work on removing everything methodically and carefully.
Tools: General workshop tools, engine crane or other lifting gear, chains or straps for lifting engine and gearboxes.Time: 2 days
Removing the engine
When stripping a chassis, the engine and transmission can be lifted out separately, or the whole powertrain can be lifted as one, if suitable lifting gear is available. This second method is often used when there is no desire to replace the clutch or rear crankshaft oil seal, and it allows for more efficient working.
However, the engine and gearboxes can be split while on the floor of the workshop, almost as easily as when in the chassis. No matter which method is used, working safely is absolutely vital – move the rolling chassis out from under a raised engine and lower the heavy component to a safer height immediately.
Wiring loom and ACE
A Defender’s chassis loom is routed through the right hand chassis rail. On Discovery 1 and classic Range Rover it’s generally routed through the body. On Discovery 2, the loom runs along the top of the chassis rail (it needs to meet many components along its journey, including the ACE valve block, ride height sensors, air suspension compressor, fuel tank, ABS sensors and the fuel filter).
After the powertrain has been removed, the chassis loom is the next job – as it would have been last on during manufacture. And Discovery 2 with ACE (as this one has) should have the ACE pipework and block removed after the chassis loom.
Fuel system
The fuel system on a Discovery 2 is a little more complicated than a simple fuel feed and return system found on most earlier Land Rovers. However, the system does not necessarily need to be broken down into component form because the run of fuel pipes from the engine back to the fuel filter housing and onwards to the fuel tank, can all be removed as one assembly, but great care needs to be taken not to strain or kink any of the hoses. Likewise, they need to be carefully stored until it is time to refit the system.
Axels and suspension
Now that the wiring loom, ACE system and fuel system has been removed from the Discovery, the rolling chassis is looking a lot simpler. Most of the remaining components are simply bolt-off jobs, with the exception of the air suspension system.
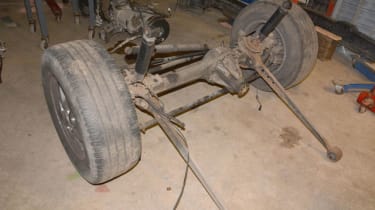
When lifting the chassis to get the axles out from underneath, help will be needed (or lifting gear) – as well as axle stands or some means of supporting the chassis. Here a pallet stacker truck has proved invaluable, both in lifting the chassis clear and supporting it while being worked on – just as long as one is not crawling underneath of course.
Health and safety
• Wear protective gloves and eye protection when handling dirty, rusty or sharp edged components. • After raising the engine/transmission, roll the chassis out and lower them to the floor before manoeuvring them. • Ensure the chassis and components are stable and secured before working. • Wear face and eye protection when releasing air suspension pipes. Undo pipe unions slowly to disperse residual pressure safely.
Click on the gallery below for our handy step-by-step guide…


