How to fit cruise control to a Discovery 2
Trevor Cuthbert shows that fitting cruise control to a Discovery 2 is cheap and easy, but take care with the air bag.
Criuse Control is one of those very useful luxuries that not only makes long motorway journeys run very smoothly, but can also be great protection for your driving licence. If used in conjunction with the posted speed limit, there is no risk of inadvertently drifting over the maximum and being caught for unintended speeding.
Cruise Control is also excellent for road sections controlled by average speed checks. Used in conjunction with the true speed reading from a Sat Nav unit, one can progress at an optimum speed without risk of breaking the law. Many Td5 Discovery 2 models are factory fitted with cruise control, or have it fitted as a dealer option. However, if your Discovery does not have cruise control, it is easy to install and it does not require any use of diagnostic equipment – it is truly ‘plug and play’.
As with any work on a Land Rover, it is best practise to disconnect the negative battery terminal before you begin. When installing cruise control it is also important to disconnect the battery for at least 10 minutes before you begin, to allow the air bag (SRS) circuits to discharge, as the air bag will be removed from the steering wheel. I left mine disconnected for around half an hour before I began work.
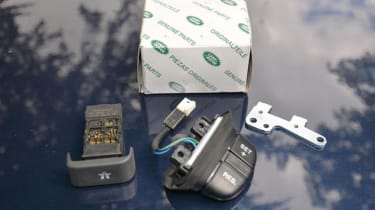
Ensure you have the radio security code when disconnecting the battery, so that you can activate the radio again when the job is finished. There of plenty of cruise control kits available online for in the region of £100. However the switches may be purchased from main dealers or good Land Rover specialists for less. I bought mine from BLRC in Saintfield, Co Down. Make sure you get the mounting bracket and, preferably, a template too.
Instaling cruise control
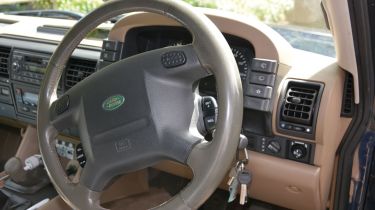
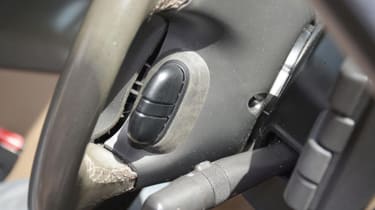
When cutting out the aperture in the right side of the steering wheel for the cruise control switch unit, bear in mind that the Discovery 2 is now at least ten years old, so the plastic may have become brittle. When drilling and filing out the hole in my Discovery, I supported the remaining thin section so that it would not break, by gripping it firmly with my other hand.
My template had gone missing (probably loaned to someone at some point), so I started by marking out an estimated hole location much smaller than I would need. I then trimmed and filed it out, until the switch and mounting plate would fit in place. Once the kit is fitted and the battery reconnected, the cruise control will function immediately as per the owner’s manual. No ECU programming is required.
Parts needed
Cruise Control steering wheel switch: Part number: YUH100320GCruise Control master switch: Part number: YUH100370 (grey) Part number: YUH000170PUY (black)
There is no part number for the steering wheel mounting bracket, although it can be found separately online for around £12.00. Alternatively, duplicate the radio control bracket. Once the steering wheel was put back together and the Torx screws tightened, the battery cable was reconnected.
The Discovery was test driven with the master switch turned on. Once up to a speed of 30 mph, the steering wheel “Set” switch was activated and the Cruise Control took over – true ‘plug and play’. On pressing the brake pedal and subsequently activating “Res” (resume), the Discovery gradually accelerated back to 30 mph.
Warning: This work entails removing and refitting the driver’s air bag module. Please take note of the advice in the WORK SAFELY panel (right). The most important thing to remember is to remove the ignition key and disconnect both battery leads before starting any job that involves air bags or any part of the SRS (Safety Restraint System). If you are in any doubt, ask a garage to remove and refit the air bag module for you.
Time: 1 hourCost: £100Constact: BLRC Tel: 02897 511763 www.blrcvehiclespecialist.co.uk
Health and safety
• Important safety requirement: Remove the ignition key and disconnect both battery leads (negative lead first) before starting work on any job involving the air bags or any other part of the SRS (safety restraint system). Then wait at least ten minutes for the system to de-activate. • When removing the driver’s air bag module, ensure the wiring harness does not bear any weight. • Handle the air bag module with great care. When it is removed, store it with the steering wheel trim pad facing upward, in a secure place where it cannot be interfered with by children or animals (such as vehicle rear load space with door locked). If unsure, ask a trained person to deal with this aspect of the job. • Take care to avoid cuts when working with the craft knife. • When re-connecting the battery leads, connect the negative/earth lead last.
Click on the gallery below for our handy step-by-step guide…
Find a car with the experts


