Pod Point Solo 3S review: electric car charger and installation tested
What should you expect from a Pod Point wallbox installation? We find out
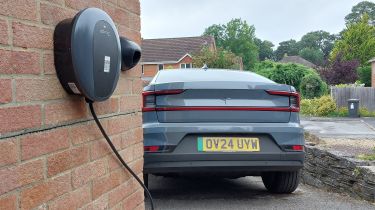
When leading home charge point provider Pod Point offered to enrol us in its installation programme, so we could track and explain what happens when new EV drivers choose a popular wallbox like Pod Point’s Solo 3S, the offer came just at the right moment as it coincided with the delivery of a swish new Polestar 2.
The firm’s £849 standard installation cost looks reasonable. There are certainly lower-priced options available, but we think choosing brands or installers on price alone may potentially prove to be costlier in the longer term. If you choose a wallbox from a company that goes to the wall, can you rely on future repairs to your hardware, or support for any software/mobile phone apps used to control it?
Choosing a better-known brand could be a way to future-proof your set-up, and it could also help to ensure your installation runs smoothly; our Pod Point engineer Matthew told us he’d been fitting wallboxes for four-and-a-half years, during which time he reckons to have installed around 3,000 wallboxes in all types of properties, which was certainly reassuring when he started drilling holes in our wall.
Before your wallbox installer arrives
It's likely the charge point provider that you choose will want to confirm some essential details after receiving your order. In Pod Point’s case, this was achieved by sending a welcome email with a link to set up a new user account via a simple web form. This account would become more important later, as once our charger was installed and connected to our home WiFi, we used it to log into the Pod Point home charging smartphone app which controls the unit. In the case of the Solo 3S, that means the ability to schedule charging in line with your off-peak electricity hours, and keep a track of your ongoing charging costs, among other things.
First though, another email from Pod Point invited us to complete a pre-installation form using our mobile phone. The online form asked us to confirm via simple tick-boxes, that we had access to parking next to our chosen wallbox location, and access to our home’s fuse boxes and electricity meter. A few pics of said location, plus our existing domestic fuse box and mains supply box were also requested, and then it was simply a case of submitting the form and waiting for Pod Point to give us an installation date.
Charge point installation day
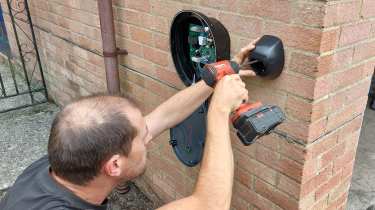
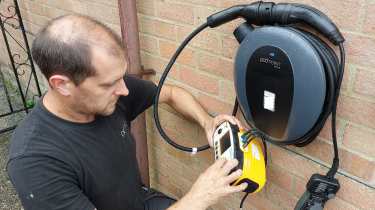
Our engineer Matthew got straight to work on the ‘easy bit’, which was drilling holes in the outside garage wall to fix the Solo 3S in place, and running two cables through the wall into the garage - one being the power cable providing the charging current, the other being a data cable. This data cable is connected to a small electronic device clamped on to the main feed from your electricity meter into your property, to measure the total current being consumed in the household at any one time. If current gets close to the limit of the mains supply fuse installed by the electricity board when your house was connected to the grid, then the Solo 3S will ‘throttle back’ on the amount of power it sends to charge your car so as not to overload the supply. This is potentially more important if you live in an older house, as you are likely to have a 60amp fuse fitted to your main supply - newer houses tend to come with 100amp mains fuses.
Our property, being older, has the smaller fuse. So our Solo 3S, which can draw up to 32amps on its own, is programmed to throttle back if and when total household power usage approaches 60amps. We could speak to our local electricity board and get the fuse uprated free of charge, at which point Pod Point could increase the safety margin via a wireless update to our charger. However, as our overall domestic consumption is pretty low - especially in those critical off-peak periods when we’re unlikely to be cooking or using the power shower as well as charging - we’re not planning to do this.
Will your installation be ‘standard’, or incur extra cost?
The basic elements of any installation will probably include the wallbox/charge point, and a splitter box to create two supply feeds from your electricity meter. One will run to the existing RCD-protected household consumer unit, while the other will run to a new, smaller consumer unit fitted exclusively to supply the wallbox charger. This extra unit is required by law, as it has a special type of RCD protection that works in two directions - in other words, it can protect you from being zapped by power flowing back into the system from a faulty car battery, as well as protecting you from faults associated with the mains supply.
Additionally, you can expect a standard installation charge to include around 10m of cabling from your mains consumer unit/electricity meter, to the exterior wall where your charger will be fitted. We were lucky, as our household consumer unit was already in the garage, and cables only had to be run across the ceiling and through the opposite wall where our charger was sited. Matthew told us there can be complications if electricity meters and consumer units are located in the middle of the house, or under the stairs, some distance from the chosen charger location. Some customers may opt to hire electricians to move things around in advance of the charger installation, but even if you do need to carry out works the average additional costs are relatively limited, typically running to less than £500.
Using our new EV charger at home
The wallbox is impressively painless to set up - there are a few steps involved as you have to first pair your smartphone app to the charger, and then connect the charger to your WiFi, but it’s achieved very simply thanks to the clear and concise instructions in the Pod Point app through which you do it.
Using the charger is also simple. Just plug in to charge in ‘manual’ mode, or use the app to remotely set scheduled times during which the unit will charge the car. We schedule charging between 12.30am and 5.30am to take advantage of the cheapest rates on our Octopus Intelligent electricity tariff, but on a couple of occasions have needed a boost during the day and switching charge modes is handled very simply by a single ‘charge now’ button on the app - which of course you can do from wherever your smartphone has an internet connection.
Enter your electricity supplier’s kWh cost - on and off peak - into the app, and it will also show you how much your charging has cost on a daily, weekly or monthly basis. There’s even a tab that shows the current CO2 emissions state of the national grid, so you can charge at the lowest levels if you want to minimise your footprint.
Need something to charge? These are the best electric cars...


